How To Build A Google Cardboard App For Android
How to build a Google Cardboard app for Android
Configure The Unity Editor To Support Android
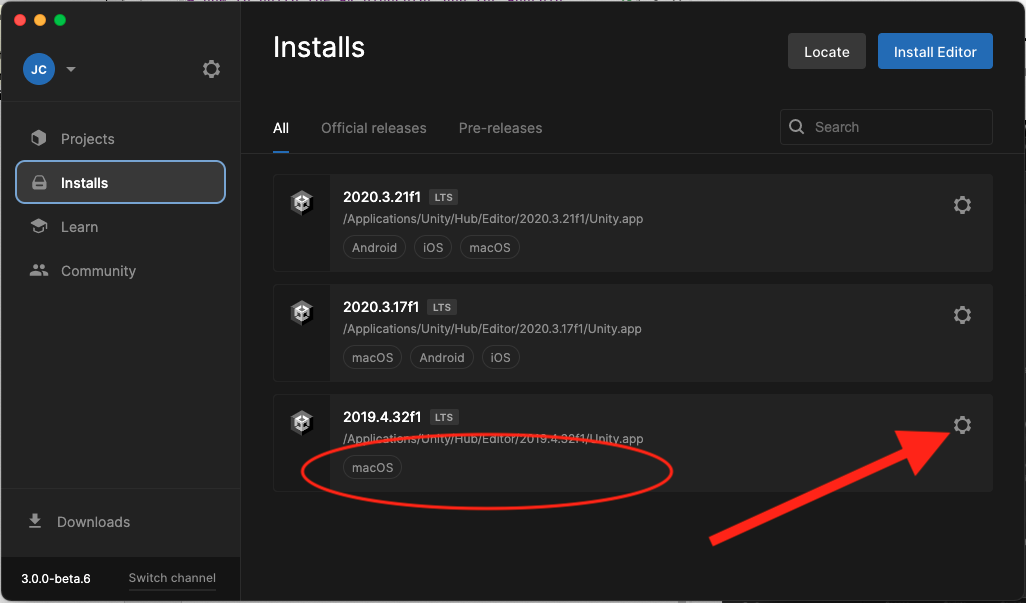
1) Open the Unity Hub application and select the *Installs* tab on the left.
Look at the entry for the editor being used by your application. It it doesn’t say “Android” in the area under the editor name, then click the settings gear button to the right.
2) Click *Add modules* in the pop up dialog.
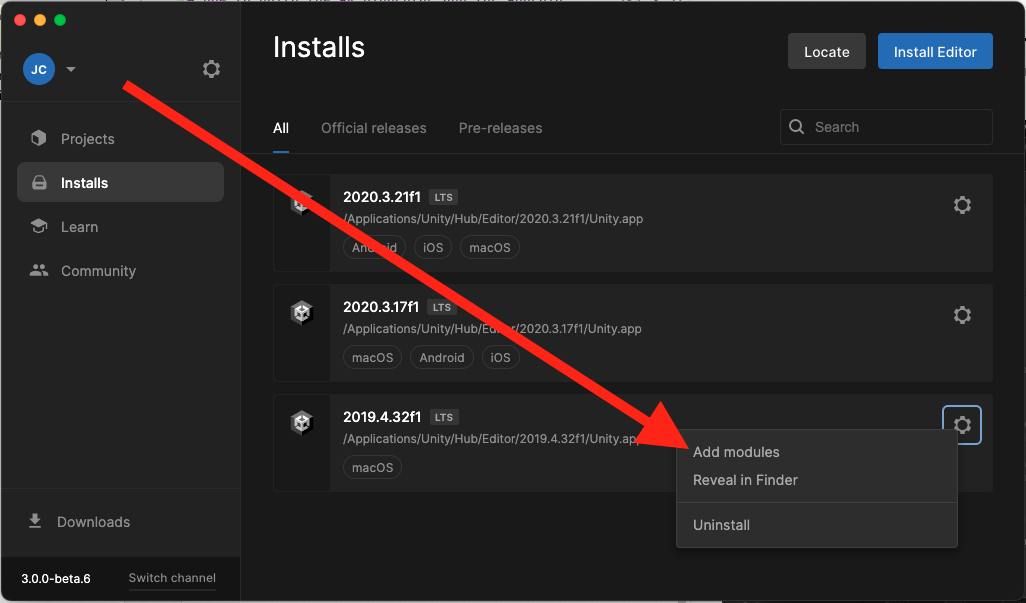
3) Select *Android Build Support*, *Android SDK & NDK Tools*, and *Open JDK*.
Then click the Continue button.
When you click Continue, the Unity Hub application will download and install the Android SDK, NDK, and JDK to your Unity editor. This may take a while.

Configure Build Settings
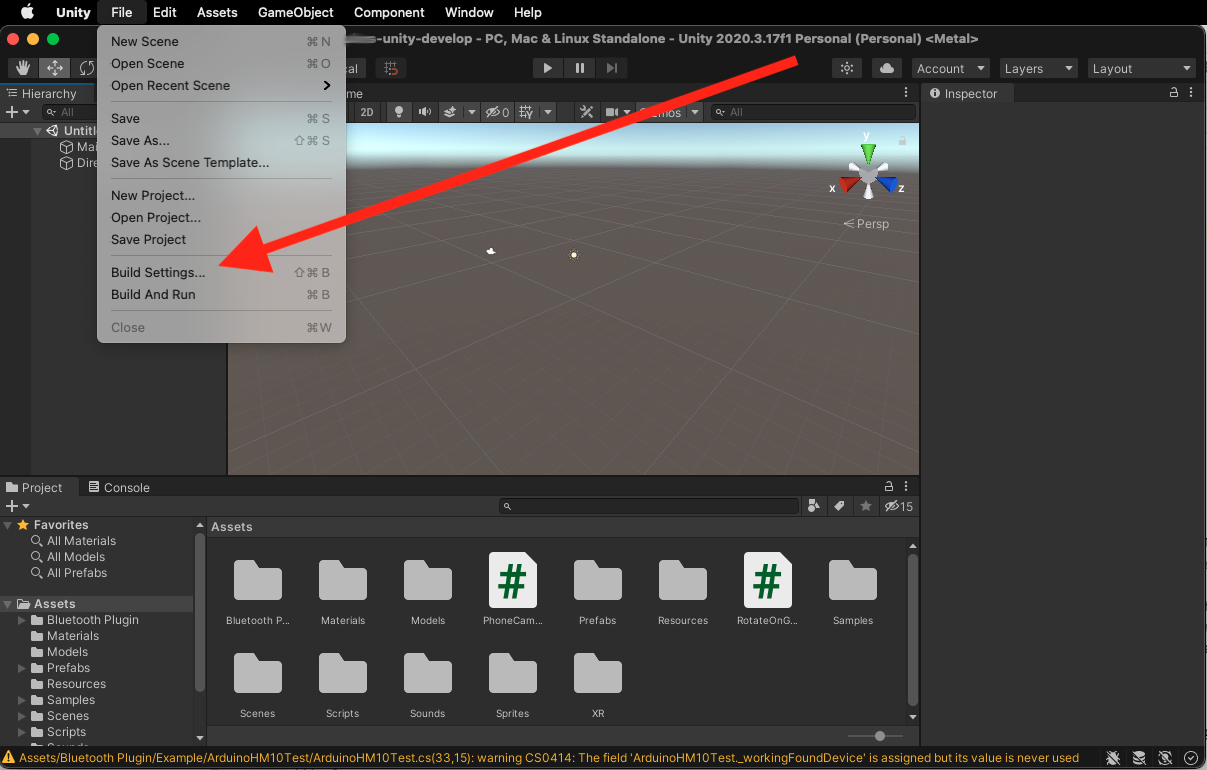
1) Open the app in the Unity editor and navigate to *File -> Build Settings…*
2) Click the button for *Android* in the *Platform* window.
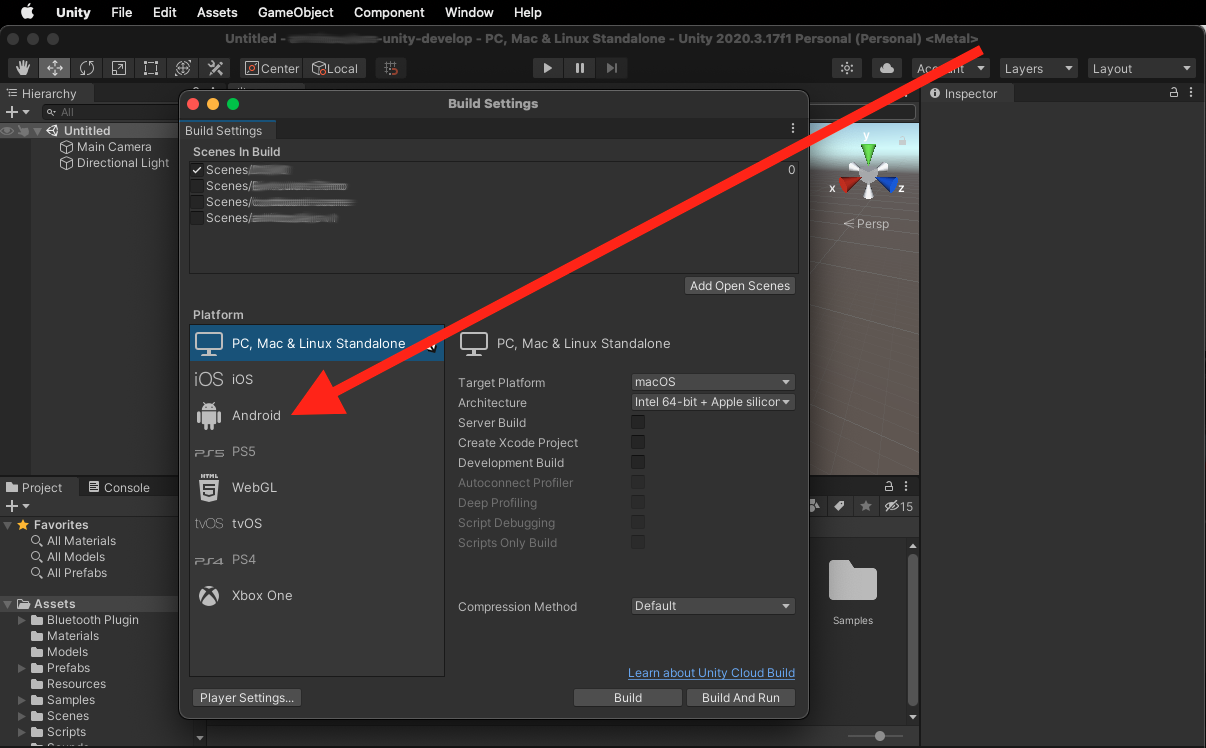
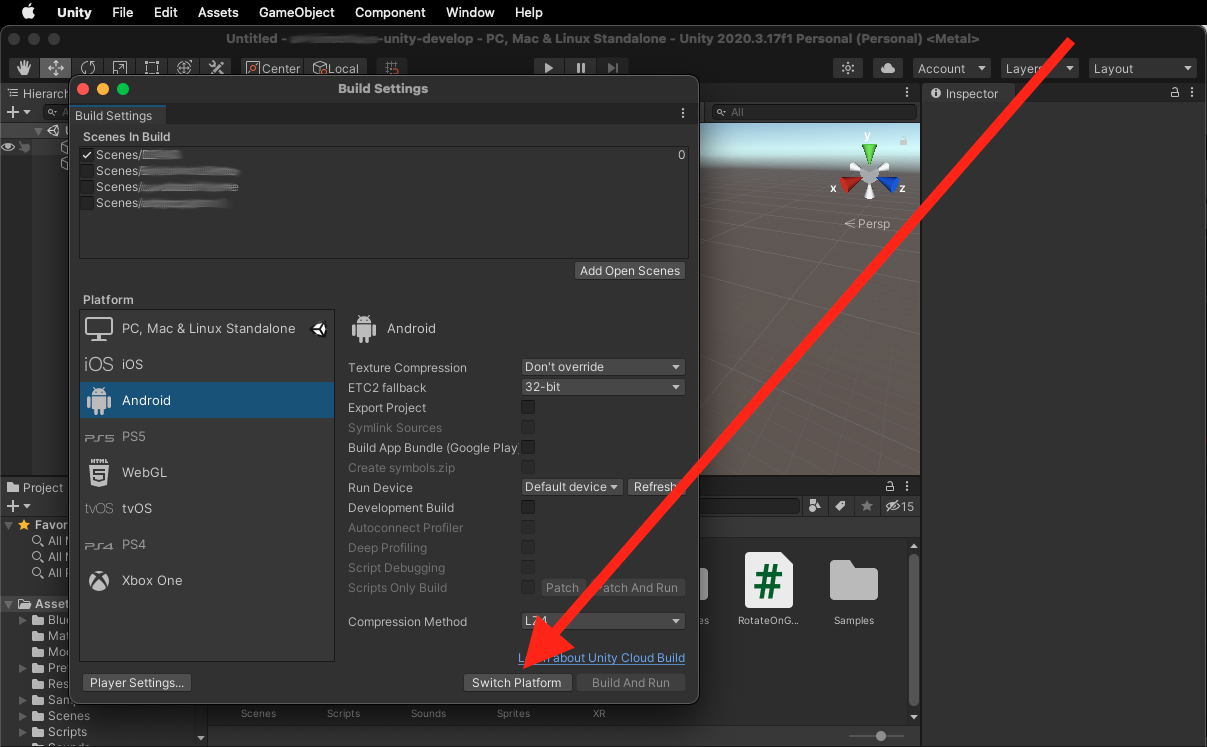
3) Click the *Switch Platform* button.
When you click the *Switch Platform* button, the Unity editor will begin downloading and installing the support software to build for Android. This may take a while.
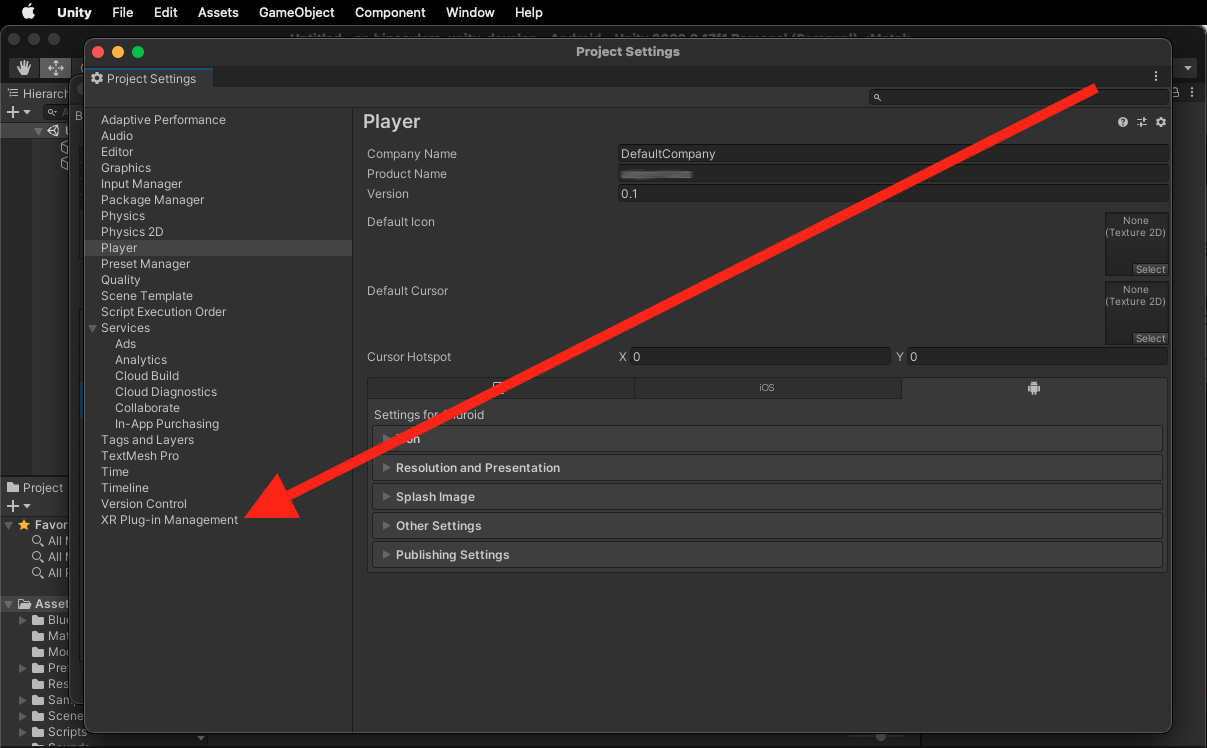
Configure Player Settings
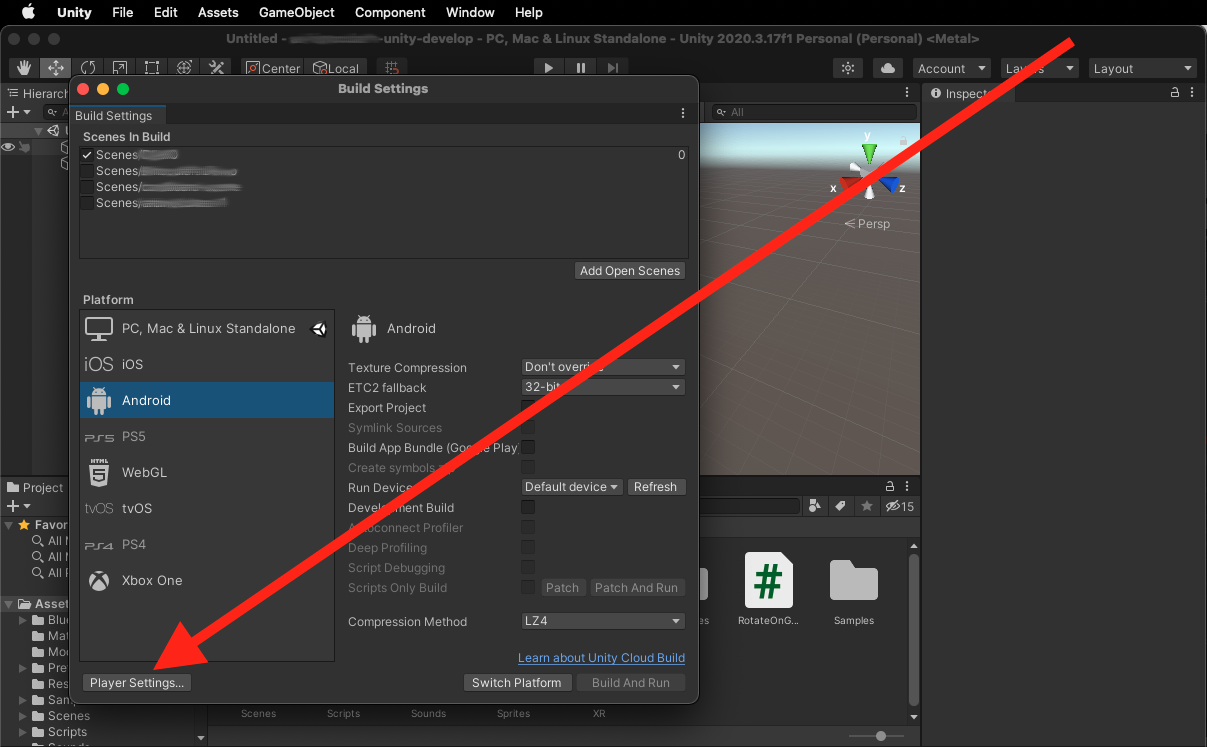
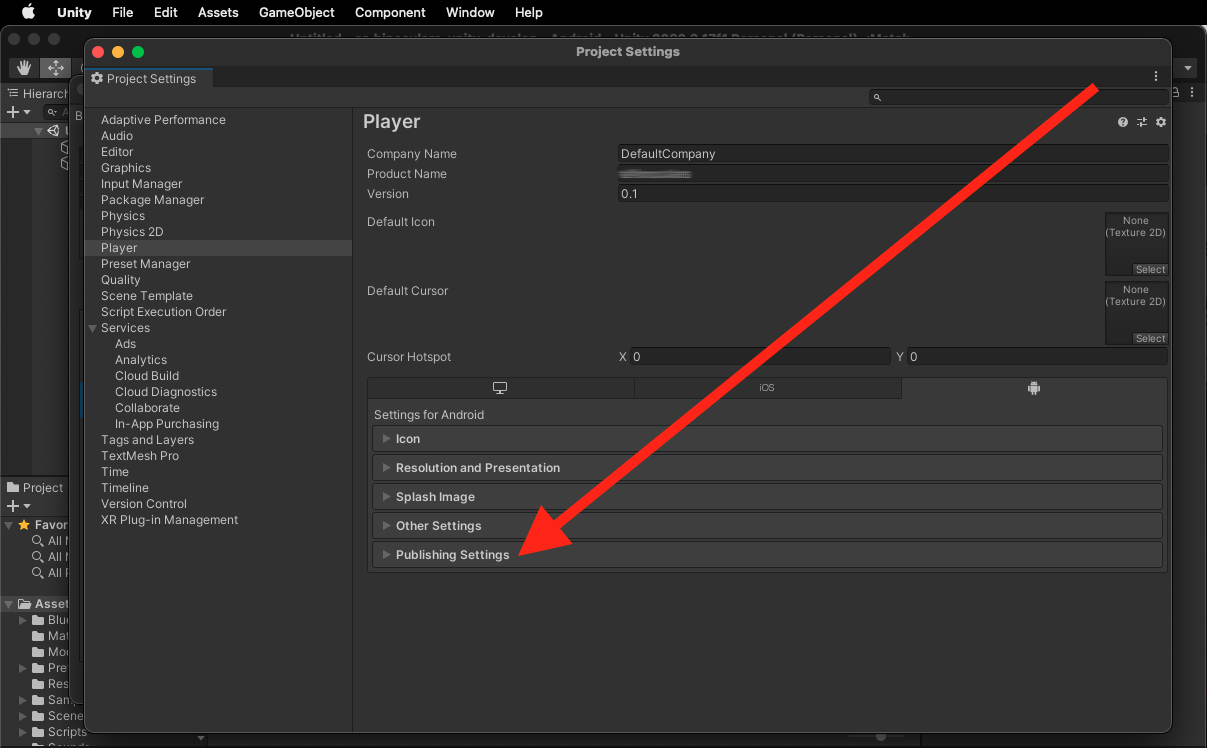
1) Click the *Player Settings* button at the bottom left of the *Build Settings* dialog.
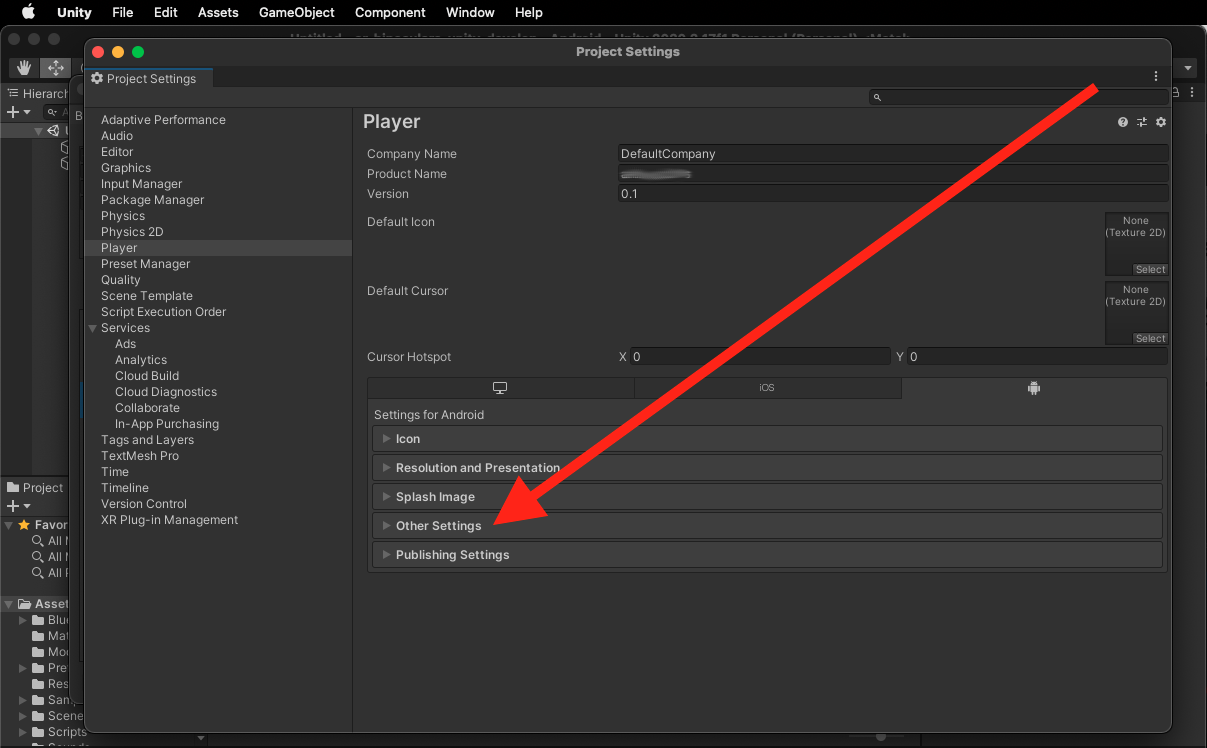
2) When the *Player* dialog opens within the *Project Settings* window, click the *Other Settings* dropdown.
2a) Select *IL2CPP* in *Scripting Backend*.
2b) Select desired architectures by choosing ARMv7, ARM64, or both in *Target Architectures*.
2c) Select *Require* in *Internet Access*.

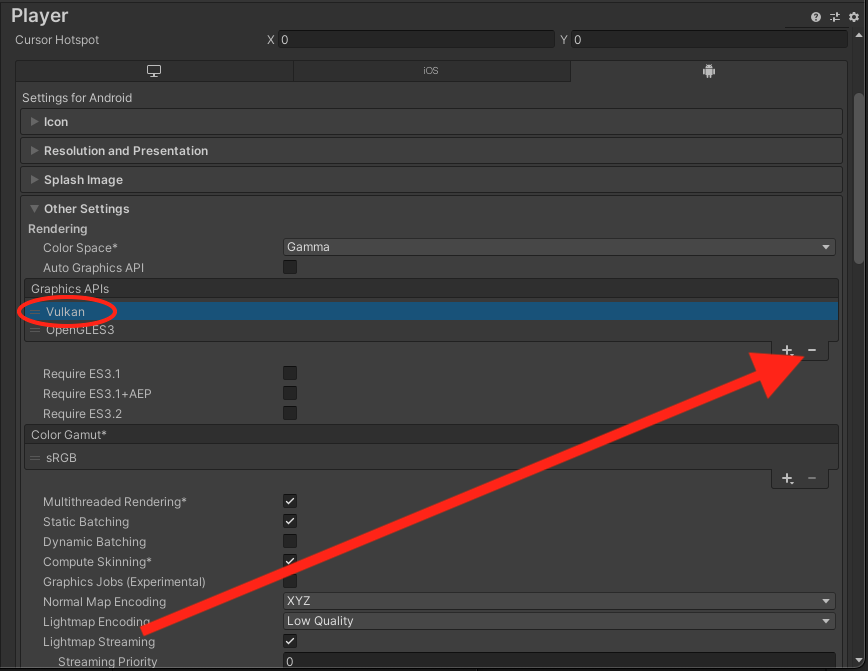
2d) Select *Vulkan* under *Graphics API* and click the minus (-) button to remove it.
3) Click the *Publisher Settings* dropdown.
3a) Select the *Custom Main Manifest*, *Custom Main Gradle Template*, and *Custom Gradle Settings Template* radio buttons.


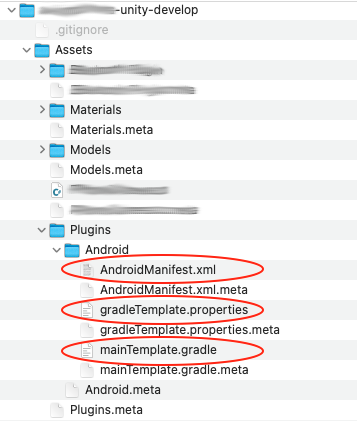
3b) Assets/Plugins/Android/AndroidManifext.xml
Add the following Bluetooth permissions to the Assets/Plugins/Android/AndroidManifest.xml file.
<!– Request legacy Bluetooth permissions on older devices. –>
<uses-permission android:name=”android.permission.BLUETOOTH”
android:maxSdkVersion=”30″ />
<uses-permission android:name=”android.permission.BLUETOOTH_ADMIN”
android:maxSdkVersion=”30″ />
<uses-permission android:name=”android.permission.BLUETOOTH_SCAN” />
<uses-permission android:name=”android.permission.BLUETOOTH_CONNECT” />
Add the following attribute to the application tag of Assets/Plugins/Android/AndroidManifest.xml:
<application android:requestLegacyExternalStorage=”true” … >…
</application>
3c) Assets/Plugins/Android/gradleTemplate.properties
Add the following two lines to the gradleTemplate.properties file.
android.enableJetifier=true
android.useAndroidX=true

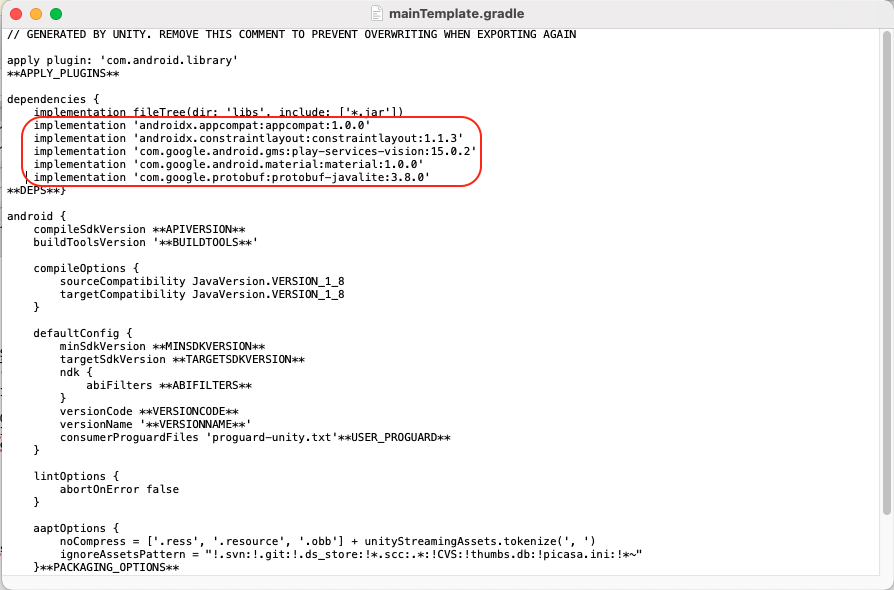
3d) Assets/Plugins/Android/mainTemplate.gradle
Add the following lines to the mainTemplate.gradle file.
implementation ‘androidx.appcompat:appcompat:1.0.0’
implementation ‘androidx.constraintlayout:constraintlayout:1.1.3’
implementation ‘com.google.android.gms:play-services-vision:15.0.2’
implementation ‘com.google.android.material:material:1.0.0’
implementation ‘com.google.protobuf:protobuf-javalite:3.8.0’
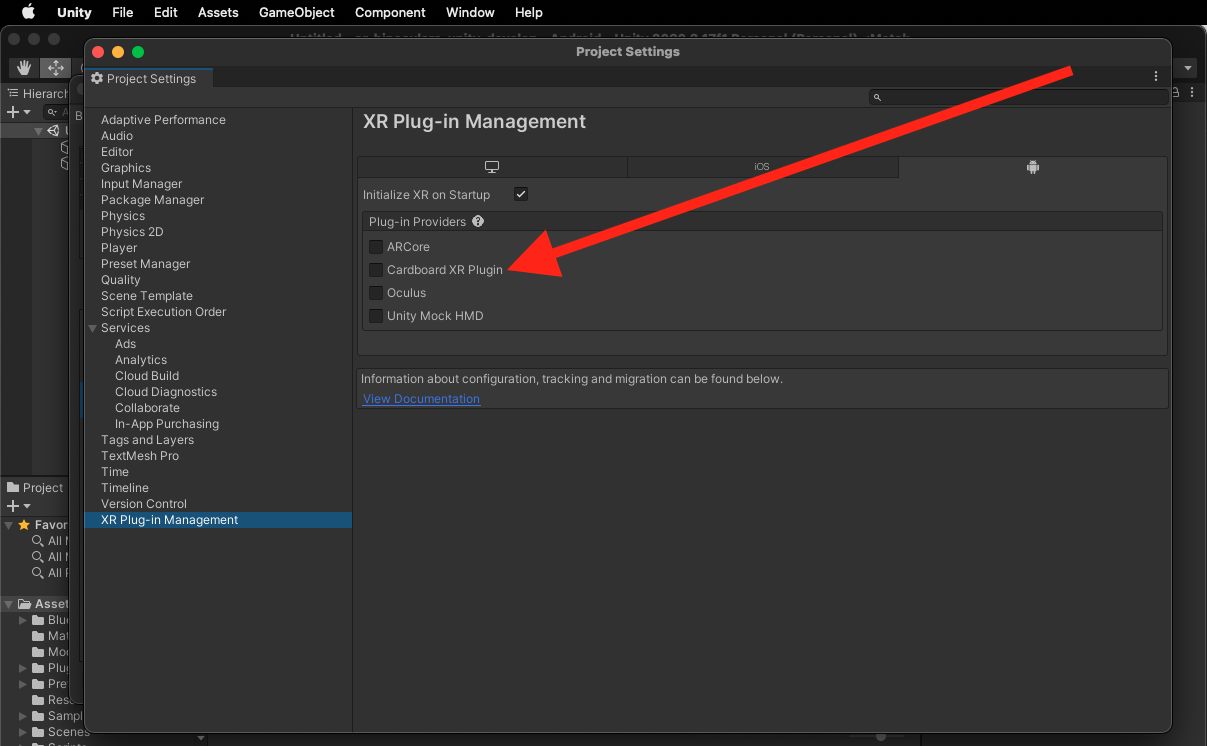
Install the Cardboard XR Plugin
1) From the *Project Settings* dialog, click *XR Plug-in Management*
2) Select the *Cardboad XR Plugin* radio button
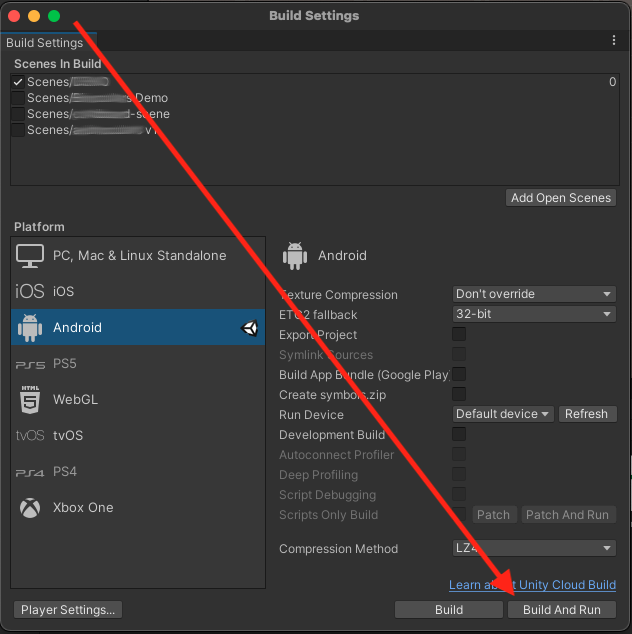
Build and Run the application
Click the *Build and Run* button on the *Build Settings* dialog.
If Unity says that it cannot find your connected device, then check to see if you also have Android Studio running. If so, then quit Android Studio. Oddly, Android Studio takes exclusive control of all connected Android devices and needs to be shut down before others can access them. This is annoying if you want to use logcat to debug your application. But that’s how it works.

But when it runs the second time, the camera will work.